Showing posts with label Herbs. Show all posts

Tuesday, May 5, 2015

The most delicious and clean tacos ever! Sweet Potato with Greens and Plantain Tortillas, Paleo, Vegan and Awesome


Today is Cinco de Mayo (yay!) it is also the middle of a strict springtime vegan-paleo goal for me. So what to do. I looooove Mexican foods, it will be one of my favorite cuisines ever and always. My eyes were first opened to mind blowing vegan Mexican food at Gracias Madre in SF. I was lucky to eat there many times, but it was a taco plate when I first fell in love. There were piles of cooked leafy greens, spiced sweet potatoes, and all the crunchy toppings. I think there were beans and loads of their wonderful freshly made tortillas. This today is my homage to them.  The tortilla making is easy as pie, but if you love corn tortillas-by all means use those!

Paleo Plantain Tortillas 
with
Chili Sweet Potato, Leafy Greens, and Avocado

Tortillas:
Makes about 14 tortillas (taco "corn-tortilla" sized)

  • 4 green plantains
  • 1/4 cup hot water (or more)
Leafy Greens:
  • 1 bunch collards, swiss chard, or kale
  • 2 cloves garlic
  • 1/2 cup water
  • 1 teaspoon ground cumin
  • salt
Sweet Potatoes:
  • 4 sweet potatoes
  • 1-2 teaspoon chili powder
  • 1  teaspoon garlic powder
  • 1 teaspoon cumin
  • salt
Also
  • Avocado
  • Cabbage
  • Raddishes
  • Cilantro
  • Salsa


For these tortillas I want a savory or neutral sort of flavor so we use the unripe or green plantains. Peeling them can be a little bit of a chore, here is a link to my earlier instructions how to do this quickly. The plantains need to be peeled and sliced into chunks before boiling for 20 minutes. You will see the raw plantain is a very pale yellow color, once it has cooked in the boiling water there's a much deeper yellow color to the flesh. 

When the plantains are fork tender drain into a colander in the sink. Wait 5 minutes so they cool a bit. Place plantains in the bowl of a standing mixer, mix on low for about 5-8 minutes. If you have the plastic guard that keeps things from jumping out the sides of the bowl now is the time to use it. If not you can hold a tea towel around the top of the bowl until pieces stop trying to jump out. 

At first it may seem very dry and crumbly, but there is a nice point when everything comes dough like. Depending on your plantains and how ripe and cooked they are this may take more time than you expect just keep the mixer on. If everything is looking very dry, which happens due to moisture escaping through the steam, add a splash of hot water until you have a consistency like cookie dough. 

With our plantain massa ready we can move onto shaping and cooking the tortillas:


You will need a tortilla press or two rigid cutting boards. Parchment paper folded in half or a plastic bag cut into two pieces.Some coconut oil or other oil of your choice. A hot griddle or frypan. 
  1. Heat the griddle.
  2. Apply a tiny bit of coconut oil to the inside spots of the full department where you will flatten the dough. 
  3. Roll a ball of the dough in your hands.
  4. Place in between the two sheets of parchment or plastic
  5. Position this parchment sandwich in between your two cutting board or tortilla press. 
  6. Press straight down, with all your bodyweight. 
  7. Remove the top cutting board and check your tortilla. 
  8. Peel off the parchment carefully, this is easier than you imagine.
  9. Move the tortilla in hand directly to the griddle.
  10. Cook on each side for about 5 minutes. They will look dry, pale, with not much color. The edges will turn out just a bit. 
Repeat until the dough is all used up! 

Cut a bunch of collards or Swiss chard into thin ribbons. Cook on the stove with two cloves of minced garlic, salt, a teaspoon of cumin, and a 1/2 cup of water. Simmer and sauté until the water has about braided and your greens are tender and bright. 

Cube your sweet potatoes into roughly half inch pieces. Toss to coat with olive oil  and 1 to 2 teaspoons of chili powder, 1 teaspoon of cumin and 1 teaspoon of garlic powder. Spread on a sheet pan in one layer. Bake roast at 350° for about 30 minutes, until they're tender. There is no need to stir the sweet potatoes while they are roasting see you can just forget about them until the timer beeps!

Clearly, tacos should be assembled right as you are going to eat them. Place a small bed of greens as a base on the tortilla, followed by sweet potatoes, then topped off with thin slices of avocado, radish, cabbage and cilantro. salsa or hot sauce is always a good idea in my book.


 Enjoy!
***The tortillas will keep for a few days in the fridge kept sealed up in a bag. Very good just microwaved for 20 seconds to warm them up again. Or even better, throw on a hot dry pan till warm.

Friday, March 6, 2015

Chermoula Chicken Boulettes AKA Paleo Chicken Balls on Sticks with Magic Sauce

Chermoula sauce is like fairy dust of the kitchen, it turns all it touches into magic food. Chermoula is a North African blend of warm spices, citrus and herbs in oil which is drizzled on everything from fish to meat and veggies. It can be used as a marinade, or a dressing. And I always wish I made a double batch, so I can drizzle its magical powers on everything. 

The chicken meatballs are so simple it is almost primitive cooking, two ingredients. Without the chermoula sauce they are almost unremarkable. Organic turkey or chicken is a good choice for all the reasons we know, environmental, health,  antibiotics, nutrition and animal rights. But also know that the flavors of the poultry are highlighted here, and it is a good time to choose the most happy organic chicken. 

This is a great dish if you are feeding friends who may or may not be gluten free, egg free or dairy free, or paleo! Obviously not a dish for vegetarians, but if you were doing a big party, I would stick some mushrooms or tofu on other skewers and let the vegetarians get some chermoula loving too.


Ground turkey is easy to find where I live, ground chicken less so. Both work. A butcher will often grind it for you, or in a pinch use a food processor to mince larger pieces of meat.

Anyway, now you have your ground or minced chicken. Mix it with the salt and form compact 1.5 inch balls of the chicken mixture. Thread them on metal or soaked wooden skewers. Place them to rest on a foil lined baking tray to rest while the chermoula sauce is made.

Place garlic, cilantro or parsley, lemon zest, paprika, chili powder, cumin, and olive oil into a blender. A blender really does a better job here than a food processor. If you live an electronics free life, do it old school with a mortar and pestle, adding oil in bit by bit as the herbs get bashed up. The sauce is not an emulsion, spices and herbs will settle out to the bottom giving it a chunky look. The flavors will blossom over time.

Drizzle just a bit of the chermoula on the uncooked meatballs. 

If your outdoor grill is covered in a snowy glacier, cook them under the broiler in your stove. With the broiler on high, line up the chicken skewers. Turning as they brown, keep a close eye on them. If your wooden skewers begin to char, cover them with some foil. 

The balls take about 10 to 12 minutes to cook through. Baste them occasionally with more sauce, or scoop up the pan drippings and use that. A thermometer at the interior should read 170° when the balls are throughly cooked.  

Remove to a plate and drizzle that chermoula sauce over them like crazy. 

Note: For individual appetizers, these can be cooked under a broiler in the same manner without the skewers. After the balls are cooked, plate up with some toothpicks. 

Chermoula Chicken Boulettes
16 medium meatballs, 4-5 servings

For the chermoula sauce:
4 cloves garlic
1/2 cup cilantro or parsley
zest of 1 lemon
2 teaspoons paprika
1 teaspoon chili powder
3/4 teaspoon ground cumin
1/2 cup olive oil
pinch of salt

For the chicken balls:
1 pound ground or minced chicken
1 teaspoon salt
4-5 skewers (soak if wooden)

Find this and 101 other meatball recipes in my new book Global Meatballs! I know, that is seriously a lot of meatballs. 


Sunday, January 25, 2015

Poached Salmon Balls with Cucumber Dill Yogurt Sauce

Salmon Balls are funny to think about. Lets get it clear, these are pureed salmon made into balls, not anything weird! These taste very much like the poached salmon you know, only more light and airy. They are almost without texture and melt in your mouth. Much like a French quenelle, if you have ever eaten those. 

Delicate pink dumplings of fish are held together only by egg and just a tad of potato starch. They take only moments to cook, literally two minutes in hot water.

Some might wonder, why bother making balls when plain salmon is so good itself? Novelty, great texture, interesting party food!

If you have family members who don't enjoy fish much, fish balls may be an easy way around that. Often texture or flavor is the offending characteristic. By pureeing it, both of those change. We all have heard that fish is an important food to include in our diets. Wild salmon especially has great nutrients and Omega 3's that make it a super healthy choice.

Most children should be eating more fish that they probably do, if they are not big fans of fish filets, try these poached fish balls. Changing the presentation makes fish accessible and fun, you can even eat them with your fingers!

It would be a very sophisticated choice for a party appetizer, served warm. I really enjoy them served just above fridge temperature as a luncheon dish. or stuck with toothpicks at pot luck. Once poached, they keep in the fridge for a day or two. So it would be possible to make the salmon balls one evening, stick a platter in the fridge and bring them to the afterwork party the next day, drizzled with sauce.


Warning:
The first time you make fish balls you may feel that you are committing a crime. When you put the nice fillet into the food processor, your heart may catch in your throat and you wonder if you should just pan-fry the thing. I know the feeling. But I urge you to take a deep yoga breath and just trust in trying something new. The paste may look terrible at first, just keep calm and fish-ball on


The cream sauce in my book is made with sour cream. But here I would like to share my yogurt sauce recipe, which is what I gravitate to. Plain yogurt, greek yogurt, goat yogurt, and sour cream are different but would be totally interchangeable here. Though plain yogurt will result in a thinner sauce. 

They are dead easy to make, fish and other ingredients go into the food processor. Get a big pot of salted water at a rolling boil. Then, very important, turn the heat on the water down, so it is no longer boiling. A very light simmer means the water is moving but not aggressively at all. (If the water boils, your fish balls will break apart.)

I use a mini scooper, it holds near to 2 teaspoons. If you don't have one use two small spoons to fashion ball-like portions. 

As each portion of fish-paste is scooped up, deposit it into the very-lightly-simmering poaching water. Continue, working in batches, each ball will fall in the water, puff up a bit, and then rise to the surface when it is near done. I find mine require about 2 minutes total in the water to cook. 


Remove them with a slotted spoon to a plate. Much of the excess water will steam off. Repeat with all remaining fish paste.

Mix up the dill sauce, chopped dill, peeled diced cucumber, yogurt, salt, pepper, a squeeze of lemon. 


Poached Salmon Balls
makes 25 fish balls

Cucumber sauce:
  • 1/2 cup peeled, diced cucumber
  • 1 cup Greek yogurt
  • 2-3 tablespoons chopped fresh dill
  • 1/2 teaspoon salt
  • fresh ground pepper to taste
  • squeeze of lemon as needed

Salmon balls:
  • 1 pound salmon, skin and bones removed
  • 1/2 cup whole milk (goat milk or non-dairy milk)
  • 1 egg
  • 1 teaspoon salt
  • 1/2 teaspoon fresh ground pepper
  • 1 tablespoon (12g) potato starch
To make the sauce, simply mix the peeled and diced cucumber with the yogurt, dill, salt, pepper and squeeze of lemon as liked. 


Cut the salmon into chunks small enough to fit into a food processor. Puree the fish until it becomes a fine paste. Add the milk and remaining ingredients. Puree about 10 seconds or as long as necessary to make the mixture very smooth. 

Bring a large pot of salted water to a boil on the stove. Turn the heat down to a bare simmer. With a spoon scoop up a small bite sized portion of the salmon paste. You can form egg shapes with two spoons, or use a mini scooper. As each is formed, drop it into the poaching water.

Each salmon ball will sink before floating. Allow to cook another minute or two on the surface (total about 2 minute cooking time depending on size of the balls.)

With a slotted spoon, remove the poached salmon to a warm plate. Cover with the dill sauce and serve warm or at room temperature. If you have leftovers, they are good chilled.

Saturday, January 17, 2015

Chorizo Meatballs Tapas Style

It's meatball season! Seriously, not only did my Global Meatballs cookbook come out on bookshelves and kindle this week, (buy it here!) but I have been seeing meatballs everywhere. On magazine covers, menus and all over twitter. Even my favorite Parisian chocolate king David Lebovitz is making meatballs this week.

Meatballs are economical comfort food, they both feed a crowd and make good leftovers. Meatballs are a canvas, easy to try some funky and try new things, but not too far out of a comfort zone.

In keeping with Sunday Night Football and the day when many of you make food for those who sit back and watch the AFC Championship, I give you these Spanish Chorizo meatballs. The meatballs are bite sized, use toothpicks or fingers, no forks necessary. They have a country style chunky texture and a smoky flavor that pairs well with chips, guacamole, wings and other game day foods.


The meat you will likely need to go to a store for, but all the other ingredients are simple and likely in most pantries. White wine, bread, paprika, parsley, salt, pepper. And an egg.  Note- you could use a light beer in place of the wine with good results!

I laid out all the ingredients today and then realized the egg carton was empty! What a nasty trick, an empty egg carton in the fridge, and I had just been to the store. I heaved a sigh and pulled on winter boots, enormous parka complete with fuzzy hood, and mittens. In the 15° sunshine I walked down the road to my aunt's house to buy some of her chicken eggs. I found her chickens in a barn door  huddled from the wind and basking in a slice of strong sunshine.


Eggs resupplied, onward I moved with meatball making. 2 slices of bread soaked in white wine. All bread is good, but best to stay away from seeded bread here, and if the crusts are very tough, omit them. This time I used white gluten free white bread from Canyon Bakehouse and it worked great! Mince parsley and garlic. Crack in one egg and measure salt, paprika, and pepper. To this, add ground pork and chorizo removed from the casings.


Roll into balls smaller than golf balls, about 1 inch across, like a ping pong ball. After I roll about 8 balls the meat gets sticky on my palms. I find a brief rinse of my hands in cool water will stop the stickiness from happening.


As they are made, place onto a baking tray or two. Parchment paper or foil makes for easy cleanup, but is not necessary to avoid sticking while baking.

Bake in a preheated oven at 350° for 30 to 40 minutes.

When done the meatballs will sizzle on the pan, they will have tightened up, taken on a golden color, and an internal temperature of at least 160°.


Pile onto a serving platter with napkins and toothpicks nearby and watch them be enjoyed. I like a glass of crisp white wine with mine, but beer would is just as good, if not more appropriate for the Patriots vs. Colts and the Seahawks vs. Packers playoff games. It will be a tense afternoon.

Stay tuned for two opposing meatball recipes for Superbowl Sunday!


Chorizo Tapas Style Meatballs


  • 2 slices bread (regular or gluten free)
  • 1/3 cup white wine or light beer
  • 4-6 ounces uncooked chorizo sausage 
  • 1 pound ground pork
  • 1 egg
  • 3-4 cloves garlic
  • 2 tablespoons fresh parsley
  • 1/2 teaspoon paprika
  • 1 teaspoon salt
  • 1/4 teaspoon black pepper


Preheat the oven to 350°

Soak the bread in the wine for 10 minutes.

Mince garlic and parsley. Mix in a bowl with the egg, paprika, salt, black pepper and mushy bread and wine mixture.

Remove the chorizo sausage from their casings. Add the sausage meat and ground pork to the bowl as well. Using a hand, squeeze everything together over and over to combine it very well.  Bread, herbs, and meat should we well mixed, yes you can see the independent parts but they are evenly distributed.

Roll into ping pong sized balls (1 - 1.5 inches) place on a baking tray, bake for 30 to 40 minutes at 350°. Serve hot or at room temperature.


Wednesday, October 8, 2014

Baked Pesto and Egg Tomatoes: Stuffing Part 3

A few things about tomatoes; The longest tomato plant ever measured was 65 feet and USDA says they are 25,000 varieties of tomato. Other sources claim only 10,000. Still a lot of varieties.

One of these varieties is a stuffing tomato! They resemble a cross between a tomato and a bell pepper, with thick walls, empty space inside and very little juice.


They are the sort of thing you may find at a farmers market, or more likely a friends garden. My uncle grew these beauties with red and yellow stripes.


They are light for their size and all the seeds hang clustered in the middle.


The innards are easily scooped out using your fingers. The seeds and ribs can be gathered in a bowl and thrown into a stew or whatever you are making next.

Some people like to stuff tomatoes with tuna salad or rice. This is part of my series trying out healthy takes on stuffed veggies, see my stuffed poblano peppers and paleo vegan stuffed mushrooms.


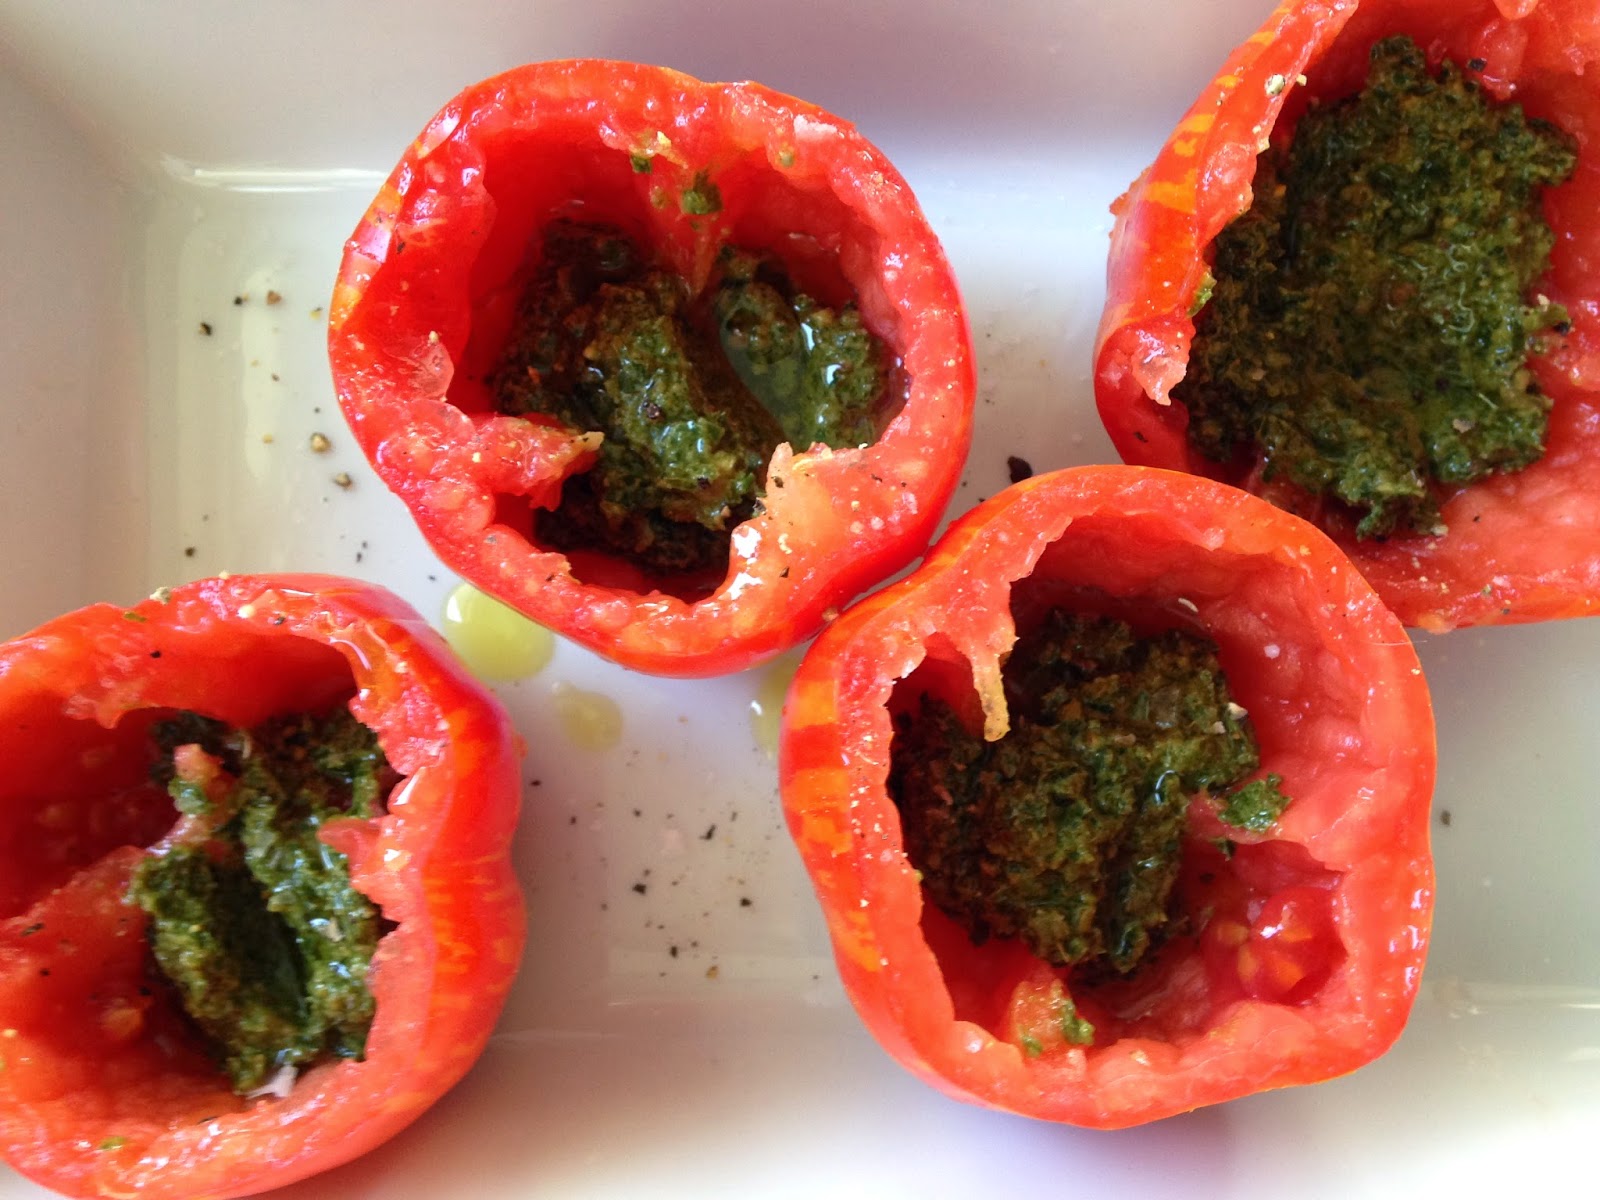
What I like best with tomatoes is PESTO! Set the tomato cups upright in a baking dish, scoop in a spoon of pesto into each, drizzle a tad bit of olive oil (I'm not sure if this is necessary but it felt right at the time) a sprinkle of salt and fresh ground pepper.


The other thing I love most with tomatoes is eggs. Well, to be honest I also love mayonnaise. That will have to be another day. Today I loved eggs the most. The way Brits serve warm tomatoes cooked on the griddle alongside morning eggs and toast. Sunny diced tomato folded into scrambled eggs, or a pan of shakshuka. Sign me up.

Easy as pie, tip a cracked egg into each tomato cup. Hopefully your tomatoes, like mine, would be the perfect size for an egg.

Sprinkle with salt and pepper for good measure. Bake in a preheated oven at 375° for 20-25 minutes. Keep an eye on them towards the end, the whites should be set and the yolks still have a softness.

This is tricky to achieve, if you figure it out send me a message. My baked eggs always turn out with a nearly solid but still creamy yolk. I wish they were more runny, but I strongly hate loose uncooked whites on my plate. I have big goals for my life, figuring out baked eggs is one of them.

Serve alongside a salad for an inventive brunch dish. Every bit is delicious, When cut into the tomato bowl gives way, the egg slides apart, and the hot basil pesto covers everything. Decadent and special and yet healthy and feel good food.


Baked Pesto and Egg Tomatoes

serves 2

4 stuffing tomatoes
4 fresh farm eggs (on the small side)
4 tablespoons of basil pesto
drizzle of olive oil
salt and fresh pepper
good balsamic vinegar and salad for serving

Cut off just the tops of the tomatoes and remove the innards to prepare for stuffing. Place in a baking dish. Put one tablespoon of pesto in each tomato. sprinkle with salt, pepper and olive oil if desired. crack one egg into each tomato. Bake in a 375° oven for 20-25 minutes until the eggs are cooked to the desired level of done-ness. 
Serve alongside a salad drizzled with balsamic vinegar.

Monday, July 7, 2014

Fattoush Salad


Fattoush is an excellent summertime salad to utilize the produce of the moment, crisp crunchy vegetables. I came home from the farmers market with cucumbers and radishes. I had pita bread triangles in my freezer, leftover from a dinner party. I will add fresh mint and parsley next time, I didnt have any, and honestly it is good without it. All together it came into a good dinner. Allowing the salad to marinate for 30 minutes is helpful to infuse the crisp veggies with seasoning.

Garlic and salt in mortar and pestle


Very recently while in Pottstown, PA and hungry for dinner before running off to a movie, we found an amazing cafe hidden in a residential street. The iCreate cafe, revels nothing about what is inside.

A row house set up as an endless row of living rooms, with cafe tables and lounging areas. The world cup was playing on a projector. Everything mismatched, clearly homegrown, a space created by the owner, I sank into a couch in front of dishes of hummus and baba ganoush and pita breads, feeling entirely relaxed, happy and at home.

If it wasn't close to closing time, I would have sat there for hours. But it was almost closing time when we arrived, and we were happy to eat something which wouldn't be much work for the owner to prepare, as he was clearly cleaning up when we arrived, when we ordered the pita breads and dips, I wondered aloud if he had any fattoush salad, or something equally fresh. 
Toast pita bread


"You want fattoush?"

"Well, yes, only if it is no trouble, like if you have some made up...?"

"Its no problem." 

Ash began to make the fattoush salad from scratch. I peaked to see him mashing garlic in a morter and pestle, toasting pita breads, making dressing from scratch, tearing mint and parsley, adding more olive oil to the salad at the end. I felt sort of bad, that he was going to the trouble at the very end of the night. If you have worked in a kitchen, you know the feeling. He worked with ease, on the other side of a bar counter, where he chatted with us and the remaining guests who after their dinners had been hanging around like it was their own apartment.


The salad packed up in a large to-go container, we settled the bill and made our goodbyes to new friends. I smuggled the fattoush into the movies in my purse, with crossed fingers the dressing would stay put where it belonged! 

Cucumbers and Radish
The previews are too long these days, but it was devoured before they were over. Big chunks of tomato and cucumber, Loads of fresh mint and parsley. Tangy and fruity olive oil dressing and lots of toasted chewy pita bread torn into it. At that moment I was so grateful he went to the trouble to make this salad, this work of art. That is one of the best salads ive ever had. Defiantly the best ever eaten in the reflected light of a movie theatre.  


Leftover pita bread
The previews are too long these days, but it was devoured before they were over. Big chunks of tomato and cucumber, Loads of fresh mint and parsley. Tangy and fruity olive oil dressing and lots of toasted chewy pita bread torn into it. At that moment I was so grateful he went to the trouble to make this salad, this work of art. That is one of the best salads ive ever had. Defiantly the best ever eaten in the reflected light of a movie theatre. 
Inspired by the fattoush salad at iCreate cafe, and the one in Ottolengi's Jerusalem cookbook, this is my version of the classic salad from the Middle East. 


Fattoush Salad


4 small cucumbers
1 cup cherry tomatoes or 2 medium tomatoes
1 bunch radishes
4 garlic cloves
salt, to taste
two whole wheat pita breads, more or less
1/8 - 1/4 cup olive oil, more or less
3 tablespoons lemon juice
1 tablespoon apple cider vinegar
1/2 cup plain yogurt 
1 tablespoon dried mint
handful of fresh mint and parsley (optional)
2 teaspoons ground sumac, to garnish
fresh ground pepper


Chop the cucumber into large bite size pieces. Slice the tomatoes and radish, put all the veggies into a bowl. Put a the garlic along with a pinch of salt into a mortar and pestle. The salt helps break down the garlic into a paste. Scoop the garlic paste into the veggie bowl. Add the dressing ingredients to the veggies, lemon juice, vinegar, olive oil, salt and yogurt. Toss well to mix. Add the herbs, dried mint and whatever fresh mint and parsley you have on hand. Mix them in well, set aside for 30 minutes so the dressing marinates the veggies. 

Briefly toast pita bread, in a toaster, or a skillet. The effect is to dry and toast the outside, but keep the inside soft, we aren't making pita chips here. Keep the pita to the side until ready to eat. 

Tear the pita breads over the salad, garnish liberally with sumac and ground pepper. Drizzle a little more olive oil on top, why not!

Serves at least 4 as a side or 2 as a main course.

Fattoush Salad

Sunday, June 8, 2014

Beet, Avocado, Cilantro and Goat Cheese Soft Tostada


Beet, Avocado and Goat Cheese soft tostada

I havent posted in a week because I was busy in San Fancisco doing too much of this:

How to have fun in SF
There was a little work involved somewhere in there, mostly it was eating tacos, drinking coffee, cocktails, and sitting around in the sunshine. Sitting around in the sun resulted in a nice sunburn, which my friends thought was the effects of frozen mimosas, but the next day was clearly a sunburn. (more on frozen mimosas later!)

La Palma's corn tortillas
There was a transportation strike one day, so I decided to walk instead of ride, all the way to what might be the center of the Misson at 24th and Alabama street, which is certainly the center of tortillas in San Francisco. La Palma Mexicatessen, the food there is good but the reason to go is the quality and variety of tortillas which you can buy in big stacks still hot from the griddle.


They are handmade by talented ladies in the back of the shop, and if you peek through you can see them at work. There are big tortillas, little and tiny baby ones. Double thick gorditas and hand flattened ones which are rustic with a thicker edge, like a pizza. In white, yellow, blue, and green. I bought a stack of handmade blue corn, white corn GMO free, and ones made with nopales cactus which were a grassy green.


Why did I buy so many tortillas?  The answer anyone who lives on most of the east coast would know, you just cant find them here. (If anybody knows of a place which makes real tortillas in/near Boston, let me know asap.)

GMO free corn gorditas
So there I was with my 8 pounds of still steaming tortillas, condensing in their packages and the sweet smell of corn wafting out of my bag. I carried them around most of the day, and then onto the plane. I didn't eat them the whole time. We opened the packages for lunch on my first day home, and I have had tortillas at least once a day for the last few days I've been home.


I did put some in the freezer to test if they would hold up.


When I run out, I will learn how to make my own masa and fashion homemade tortillas. It cant be too difficult, as households all across Mexico and beyond make them regularly. Ill write a post on that once I run out of La Palma's.


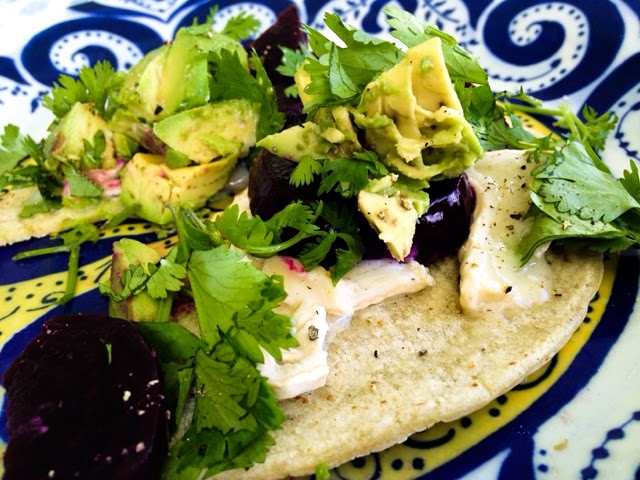
It is easy to come up with traditional and crazy taco variations. This one I loaded up too much and had to eat with a fork and knife like an open faced sandwich. It is neither taco nor tostada. Somewhere between. The flavors are likewise very Californian neither one thing or another. Cilantro is a fun way to wake up usual beets and goat cheese. Play around with the cheese also, a goat brie or camembert has more flavor and melting capabilities than fresh chevre.


Beet, Avocado and Goat Cheese Soft Tostada

for each serving:
1 corn tortilla
4 slices goat camembert or brie cheese
1/2 an avocado, cubed
1/2 cup roasted sliced beet
cilantro
1/4 of a lime
fresh ground pepper and salt

Heat the tortilla in a skillet until warm on the bottom. Flip over to the other side. Place sliced or crumbled goat cheese on the warmed upper side. It will soon melt or soften somewhat. Remove the tortilla to a plate cheese side up, careful not to loose the cheese!

Pile on the beets, avocado cubes and cilantro. Shower fresh ground pepper and some salt over it all. A squeeze of lime wakes up the avocado. Act fast to eat while warm with still gooey cheese.


Saturday, May 17, 2014

Spruce Tip Part 1: Vinegar

Spruce Tips
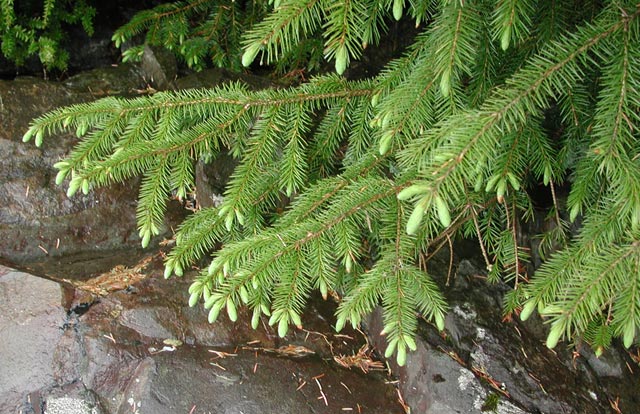
Spruce tips are an unusual food, available only for a week or two in the Spring and to those to are willing to forage for some adventurous flavor. Quite simply spruce tips are the brand new green growth of evergreen trees. At the end of each branch a little bud of brown appears, it grows until the brown paper pops off and blows away. Tender neon green nubs are revealed. The tips.

Step 1: Make sure the tree in question is in a healthy environment, no pesticides, not too close to a road, you are going to eat them, basic rules apply.

Step 2: Sample your tree, pinch off one tender tip and eat it, tasting if it is a good tree. All trees have a unique taste. Some are horrible and resinous you will want to spit them out. The good ones taste like lemon and christmas trees and something mysterious and spicy. You will know a good tree when you find it.

Step 3: Collect the evergreen tips in a bag. Know that you are essentially pruning the tree where you pinch off tips. So like any other harvesting from nature, pick a little here and a little there, not decimating one spot over another, and leaving some for the tree.

Spruce TIps
Bring the found tips home and sort through them, the little pile to the right in this picture is all the removed bits, a few sticks, older pine needles, brown paper casings and evergreen flowers which got picked along with the tips.

Spruce tips are primarily an ingredient for flavor. I hear some people make tea or beer with them. I make two simple things, an infused vinegar and a simple syrup (recipe to follow in the next post.) The vinegar is infused for four weeks and makes amazing salad dressings, imparting a tantalizing pine note to normal salad greens. Not specifically tasting like a pine trees, it tastes like the smell of a christmas tree when you think "that smells really good."


Spruce Tip Vinegar
1 cup spruce tips
Spruce Tip Vinegar Day 1
2 cups white vinegar (or apple cider)
1 jar

Sort any debris from the pile of spruce tips. I cant see any reason to wash them. Place them in the jar and pour the vinegar over. Close it tight.
Shake the jar once a day for four weeks.
Once infused, pour the vinegar through a strainer into your chosen vinegar bottle. The tips will be strained out, they are very broken down at this point, discard them.


To make a salad dressing, mix 1 part spruce tip vinegar to 3 parts extra virgin olive oil, and a pinch of salt and pepper. Shake up well and enjoy.

Tuesday, May 6, 2014

Roman Artichokes with Mint & Garlic


The artichoke is a most wonderful thing. Enormous edible flower buds. Just glorious! Growing up we had them as a special dinner in the spring, just steamed and served with hollandaise sauce. I always loved them. When I moved to San Fran I learned you could buy them as baby and young artichokes too.
http://static.ddmcdn.com/gif/willow/artichoke-info0.gif
My in-laws make these bold artichokes with mint, garlic, salt, pepper, and olive oil stuffed inside all the leaves. I liked them but couldn't get much of a recipe out of my mother in law, she always shrugged it off. And everybody said Grammy made them the best anyway. Sadly, I never had the chance to meet the matriarch of the family who was a legendary cook. One day this spring, doing research for some writing, I was deep in Italian cookbooks. A recipe jumped out at me, Roman Artichokes from In Nonna's Kitchen. There was the mint and garlic and I thought "I've FOUND IT!"

Soaking trimmed artichokes in lemon water.

I made them them for my husband, mostly following the recipe to test it out. His grandmother's artichokes are among his TOP-5 favorite foods. (Although the TOP-5 has more like 20 favorite foods.) So the pressure was on. Incidentally, I also used my pressure cooker, because somebody had a memory of Grammy using a pressure cooker, but nobody had recently. I thought this might be a clue.

The first batch were good. Really good. The only suggestion was "they should have more pepper."

So I forged on and made them for the family. I put in much more pepper, and sadly I don't have exact measurements because it is that sort of a thing so I have modified the recipe from In Nonna's Kitchen with my changes to the best of my ability.

I felt the ultimate satisfaction when my artichokes were approved as as good as Grammy's. And they wondered if I wasn't really Italian and hiding it. The whole table stripped the leaves in almost-silence, which is saying something!

Crispy Roman Artichokes

Roman Artichokes with Mint & Garlic

4 large artichokes
2 lemons
2 teaspoons dry mint
1 teaspoon dry marjoram
1 1/2 teaspoons garlic powder
2 garlic cloves, crushed
1 teaspoon black pepper (the powder)
1-2 teaspoon salt
1 cup olive oil
1 cup water
1/3 cup dry white wine

Fill a bowl with cool water, cut one lemon in half, squeeze it into the water and drop in the halves.
Trim the artichokes; remove the toughest outside petals, use scissors to cut the sharp points off the leaves, and a knife to chop off the top inch off of the artichoke. The stem is very tasty, cut the stem off at the base, and peel off the tough outside and the old cut end. Submerge the trimmed artichoke in the lemon water. This stops them from turning gray when cut, and it may tenderize them or impart flavor. The Nonna said to soak them for 2 hours, so I did, I have no complaints and will continue to do it this way!

Put the fresh garlic through a press, or mince small. Mix with the powdered garlic, dry mint, majoram, black pepper and salt. Pour some olive oil into the mix, making a thin paste. Remove an artichoke from the water, shaking it out, use your fingers to open up the petals a little bit. Scoop up some of the herb oil paste in your right hand and cup it on top of the artichoke, smoothing it downward so it goes in between the petals. Divide the herb paste among the artichokes. 

Place the herbed artichokes upright into a pressure cooker (or a regular soup pot.) It is ok to stack them on one another, use the peeled stems to hold them upright if necessary. Add the water, wine, and drizzle some more olive oil into their centers. Bring the pressure cooker up to pressure and cook for 10 minutes. (If using a soup pot, simmer covered for 35-40 minutes.) To test for doneness pull one of the outisde petals, if if falls off, it is done, if it hangs on it needs more cooking. Which can come on the stove or later in the oven. Remove to an ovenproof baking dish. The sauce in the bottom of the pan is precious and should be poured over the artichokes. (You can do up to this point ahead, and cover them in the fridge for a day or so until ready to crisp them.)

Preheat the oven to 400°, put the artichokes uncovered into the oven. Cook for about 30 to 40 minutes until the outsides are golden and terribly crispy, the oil will be sizzling. If you are in a rush, it is possible to broil them, and I did this once. It is nearly as good. It goes very fast, make sure to get the oil to sizzle madly, as this turns the flavors from a steamed thing into something terribly better. Cooked for the 40 minutes in the oven they nearly melt away in your mouth. 

Drizzle any sauce over the artichokes as you serve them. I find shallow bowls are best so you have somewhere to put the petals as you eat it. And you know not to eat the choke; scoop that out with a spoon. Happy springtime!